Joker.com Name Service: Adding DNS Records
If you're using the free joker.com nameservice, you have the freedom to configure your DNS zone as you like by adding various records. All supported types of records are listed here.
How to add a new DNS record
We took the A record as an example, but any other record type can be added in the same way.
1. Switch to our Nameservers
Check this article on how to do this.
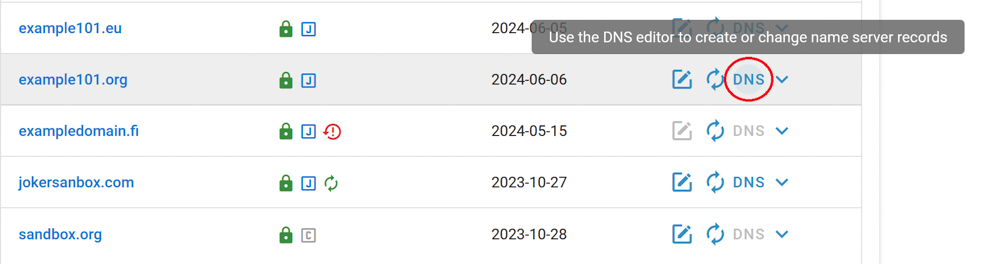
2. Once you've switched, the DNS button will become active (blue) on your dashboard next to the domain name. Click it:
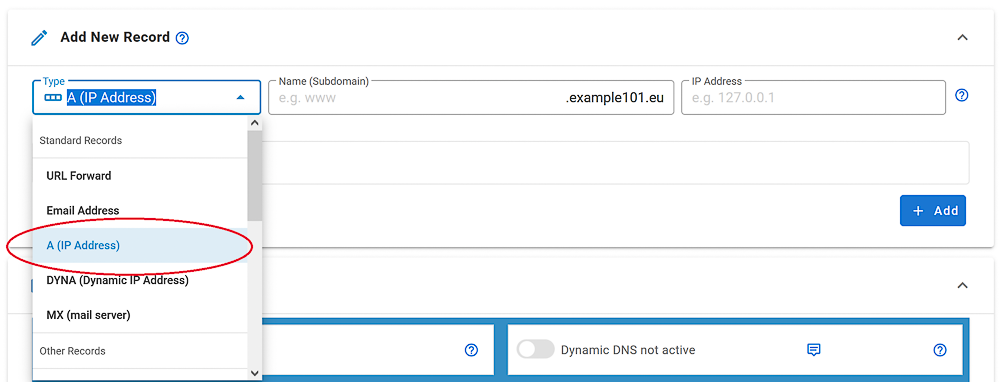
3. In the DNS configuration section, choose a record type you want to add, let's take an A-record as example:
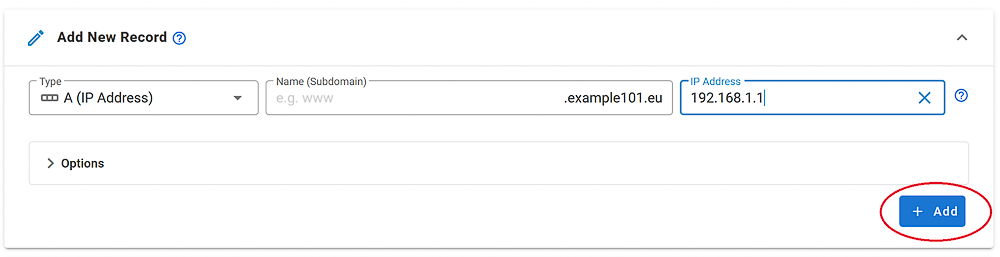
4. Add a subdomain (optionally) and target IP address, click "Add":
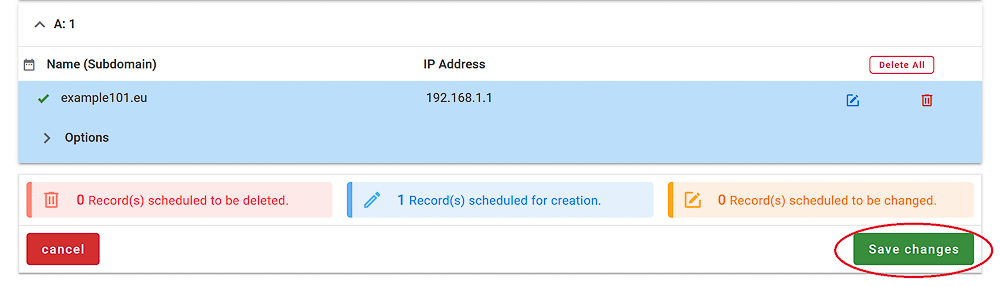
5. Scroll down to view the newly added record, check its correctness, and click the "Save changes" button:
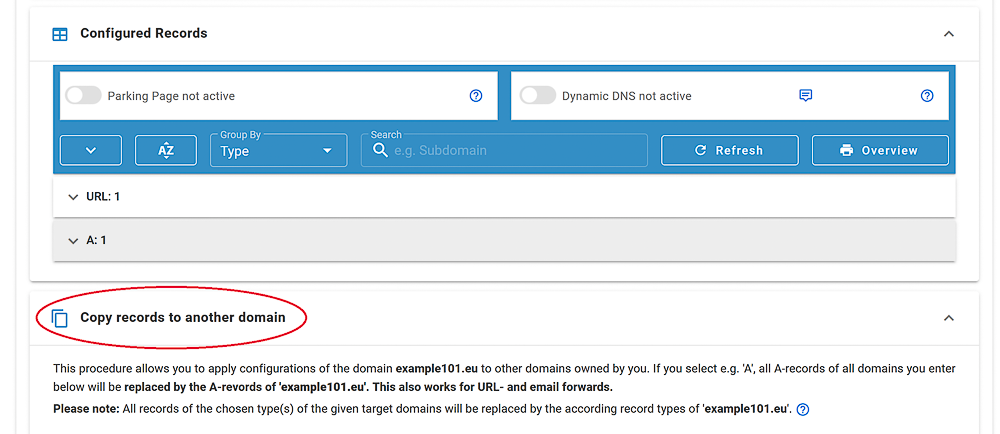
6. If you want to apply the same records to your other domains, you can click "Copy records to another domain":
7. Choose the type of record you want to propagate or select all of them. Let's use our newly added A-record for example:
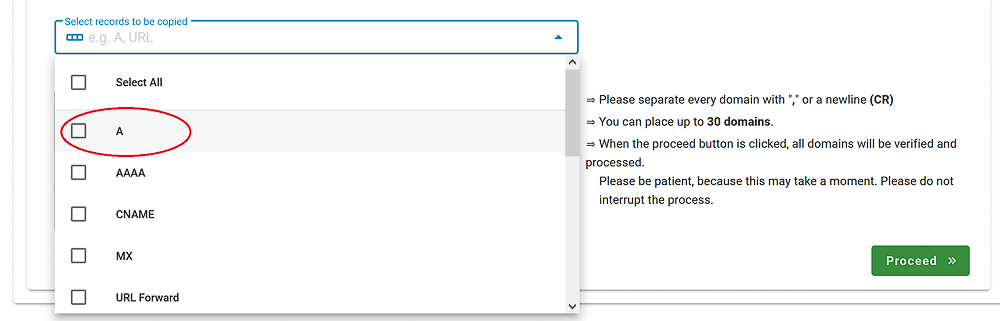
8. Type the domains to which you want to add the record, separated by commas, and click "Proceed":

Once the changes have been applied, you'll receive a confirmation email.
Adding SPF And DKIM Records
Adding SPF (Sender Policy Framework) and DKIM (DomainKeys Identified Mail) records to your domain's DNS settings helps improve email deliverability and prevents your emails from being marked as spam or forged by malicious parties.
Here's a guide on how to add SPF and DKIM records:
SPF Record
SPF allows you to specify which servers are authorized to send emails on behalf of your domain. To create an SPF record, follow these steps:
1. In the DNS configuration section, create a new TXT record.

2. In the "Content" field, enter your SPF policy.
If you are using a third-party email service like Google Workspace, they will provide you with the appropriate include value. The SPF policy typically looks like this:
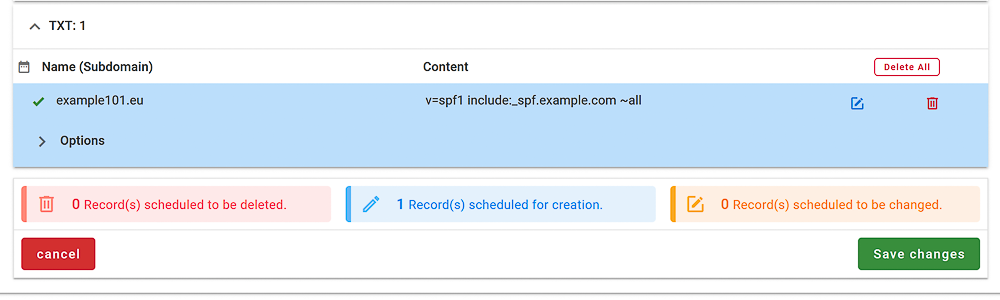
3. Save the changes.
DKIM Record
DKIM allows the receiver to check that an email that claimed to have come from a specific domain was indeed authorized by the owner of that domain.
1. In DNS management section, create a new TXT record:
2. In the "Content" field, you'll need to add your DKIM public key
The DKIM key is usually provided by your email service provider (e.g., Google Workspace, Microsoft 365, etc.). The DKIM record should look something like this:
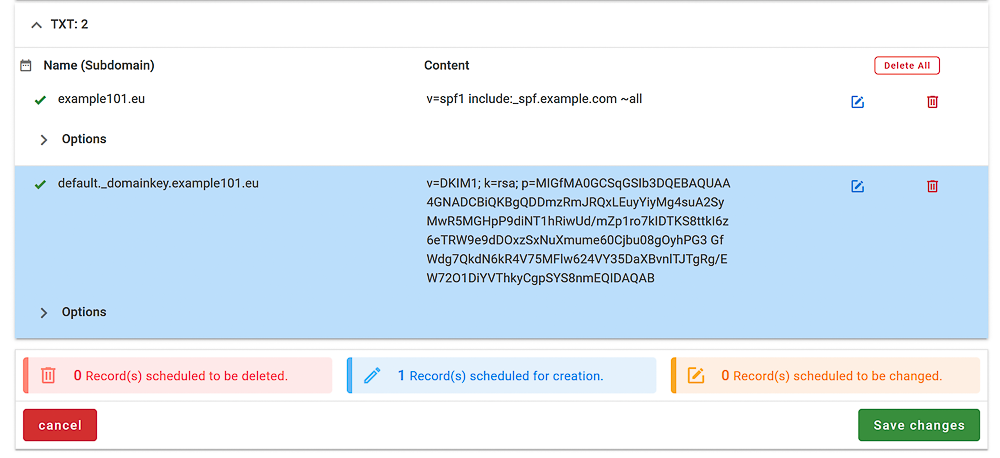
3. Save the changes.
Important: wait for DNS Propagation. After adding the SPF and DKIM records, it may take up to 48 hours for the changes to propagate across the internet. Once the records have propagated, the SPF and DKIM authentication should be active for your domain's email.