Configuring Joker.com Mailboxes with Mail Clients
To use your Joker.com mailbox with popular email clients, you have two options: automatic provisioning – use the provided files for easy configuration, and manual setup – enter the required settings yourself.
Joker email service parameters:
| Username and password | same as your login at https://web.joker.email |
| IMAP | imap.joker.email |
| Port | 143 (TLS: 993) |
| Security: | 'Password', STARTTLS (or TLS for port 993) |
| SMTP | smtp.joker.email |
| Port | 587 |
| Security: | 'Password', STARTTLS |
| POP3 | pop3.joker.email |
| Port | 110 (TLS: 995) |
| Security: | 'Password' (or TLS for port 993) |
Below, you’ll find examples of how to set up your mailbox with popular email clients.
| Thunderbird | Use the automatic account setup in Thunderbird, or set up the provisioning manually as described above. |
| IOS |
Download provisioning profile under "Mailclient Provisioning" section as shown on the screenshot below:
Or set up the provisioning manually as described above. Below, you will find step-by-step instructions on how to set up your Joker.com mailbox on IOS device. |
| Android | Set up the provisioning manually using the parameters specified above, in case the automatic configuration does not succeed. |
| Windows | Set up the provisioning manually using the parameters specified above. |

Setting up your Joker.com Mailbox on IOS device (iPhone, iPad, etc.)
1. Login to https://web.joker.email using your IOS device (iPhone, iPad, Mac)
2. Visit 'Settings' -> 'Mailclient provisioning', and click on the 'provisioning profile' link. You will get the prompt "Profile loaded".
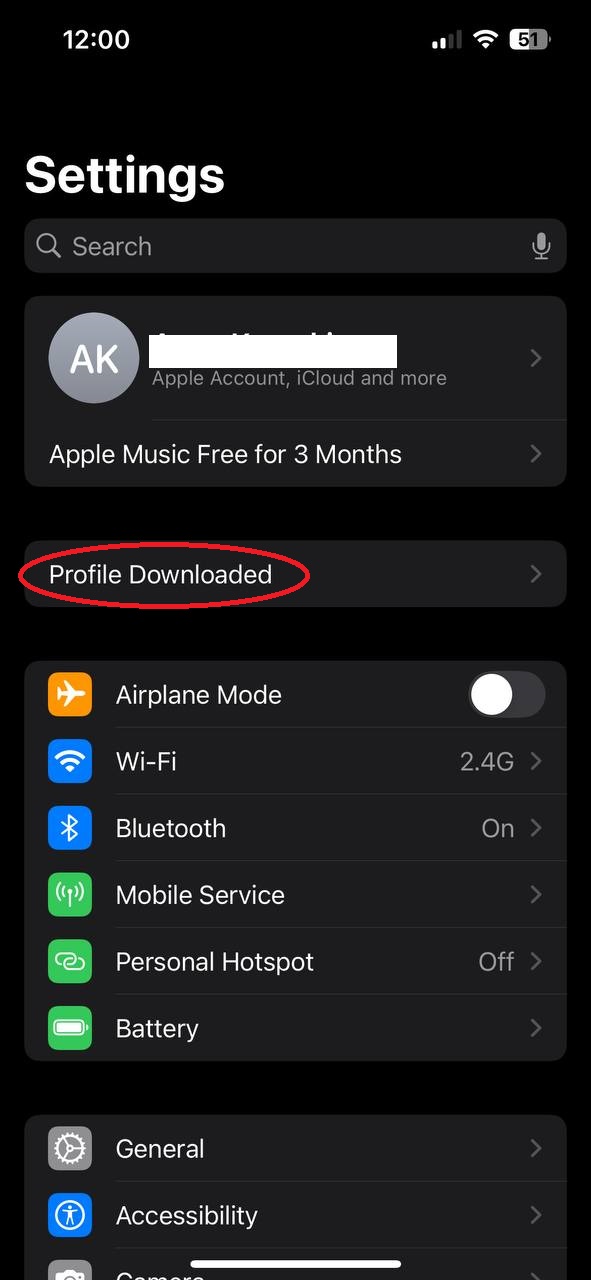
3. Go to the iPhone/iPad settings, under your account name, you will see the downloaded profile; click on it:
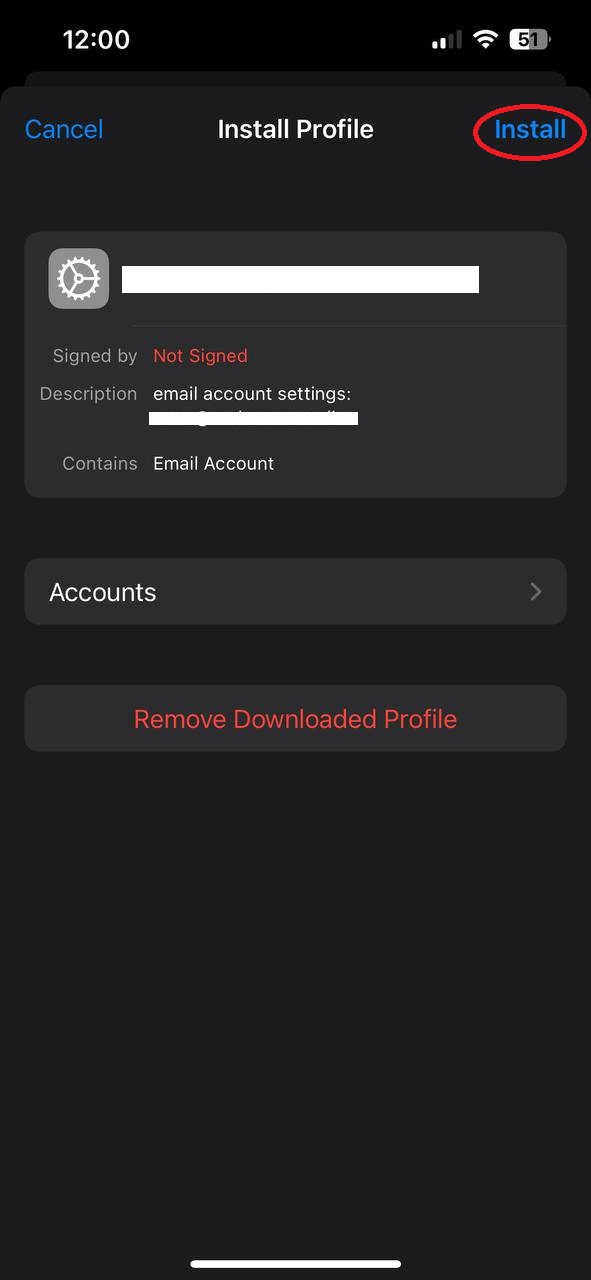
4. Click "Install":
The "Not signed" warings can be safely ignored.
5. Enter your password and click "next". It may take a minute for the profile to install.
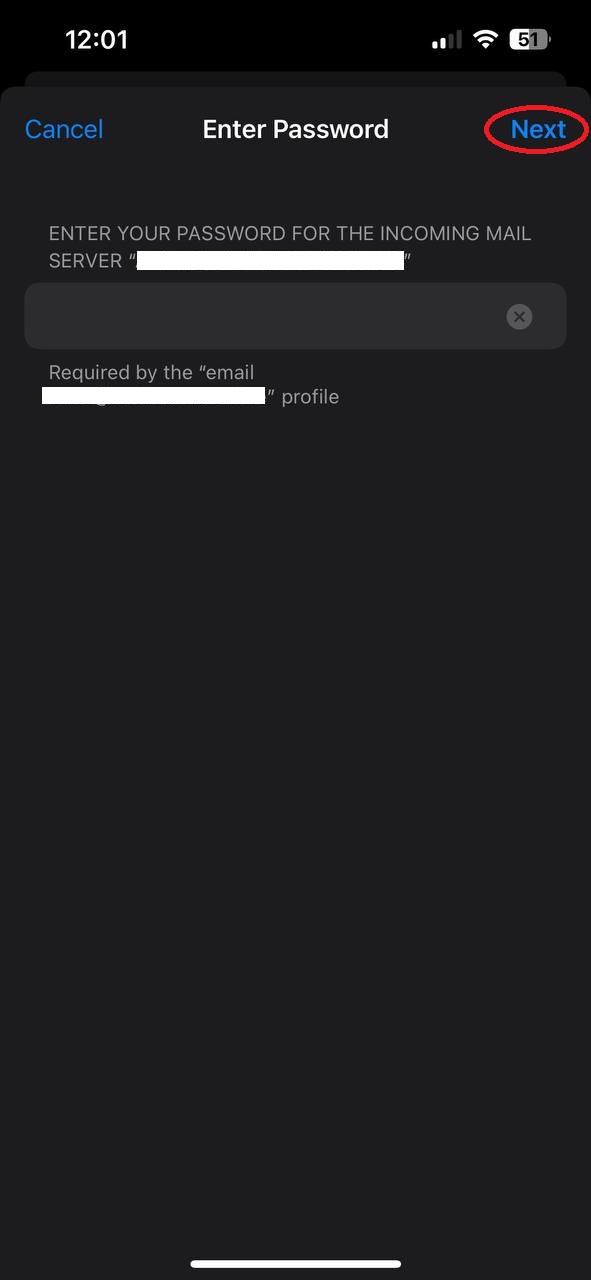
After this, you will find the new mailbox account listed in your "'Mail' app.