Mailboxes
Instructions and how-tos for Joker Mailboxes
- Introduction to Joker Mailboxes
- Creating a Mailbox
- Mailbox Management
- Webmail Client: Usage and Plugin Overview
- Configuring Joker.com Mailboxes with Mail Clients
- Mailboxes: Troubleshooting
- Email Security
- Features
Introduction to Joker Mailboxes
Welcome to Joker Mailboxes! With each domain registered at Joker.com, you can order a mailbox, allowing you to send, receive, and manage emails associated with your domain name. Here is a quick overview of the features:
- Support for multiple mailboxes: You can create multiple mailboxes under one domain.
- Aliases: You can set up to 300 additional e-mail addresses per mailbox. Catch-all alias is also supported.
-
Dynamic aliases ("plus addressing"):
- Add tags to your email address, like info+tag@sample.com, to create unlimited aliases. Great for tracking where you've shared your email address.
- Subscription Plans: Basic and Plus, please find the details below
- Webmail Application:
- Automatic replies can be scheduled.
- Emails can be forwarded to other addresses.
- Use multiple sender identities in one mailbox.
- Includes an address book that syncs with CardDAV-based address books.
- Optional two-factor authentication for extra security.
- Import and export email messages easily.
- Compose emails using a visual editor (WYSIWYG) or plain text.
- Use full SIEVE filter functionality.
- No ads.
- Direct access for email clients: Connect to your mailbox using IMAP or POP3 with standard email apps.
- SMTP mail relay: You can send emails using any address, not just the mailbox address.
- Server-side email filters: Set up custom rules to organize your email automatically.
- SPAM Filtering: recognized SPAM emails are rejected by our systems. This is adjustable by the user.
- SPF and DKIM: These email authentication methods are automatically set up (to prevent spoofing).
For a more detailed description of the available features, please visit this page.
To ensure the best experience with Joker Mailboxes, please check the conditions here.
Subscription Plans
Basic |
Plus |
|
| Storage | 2 GB1 | 10 GB1 |
| Aliases | up to 25 | up to 300 |
| Allow "+"-subaddresses | yes | yes |
| Full Sieve filtering | yes | yes |
| Full SMTP relay with TLS encryption | yes | yes |
| Direct IMAP access with TLS encryption | yes | yes |
| POP3 support with TLS encryption | yes | yes |
| Maximum emails sent per day |
1002 |
5002 |
| Maximum attachment size |
20 MB |
100 MB |
1) If the storage space allocated to the respective mailbox is exceeded, Joker.com reserves the right to stop the receipt of emails
2) Fair-use regulation, limits are only applied in the event of conspicuous or persistent unusual overruns
Mailbox Life Cycle
If you purchase mailboxes for an existing domain, the term of the mailbox is adjusted to the term of the domain name for technical reasons. For your benefit, you will only be charged for full years (rounded down).
If you buy mailboxes without renewing the domain beforehand, you will be charged at least one year for the mailbox service, even if your domain has a term of less than one year. To avoid disadvantages due to shortened mailbox terms, it is advantageous for you to renew your domain first and then create the mailbox.
Acquire a mailbox for an existing domain (I)
Let's assume you own a .com domain that has a remaining term of 7 months, and you want to add a basic mailbox:
| basic mailbox 7 months = 0.6 years: | USD 6.67* |
| result - domain term is unchanged, and 7 months of mailbox service |
USD 6.67* |
| mailbox is only charged for the remaining term of the domain | |
Acquire a mailbox for an existing domain (II)
Suppose you have a .com domain that has a remaining term of less than 1 month.
| basic mailbox <1 month = not charged | USD 0.00* |
| result - domain term is unchanged, and 3 months of mailbox service |
USD 0.00* |
| in this case, the mailbox fee is rounded down to zero - you will still get an invoce, which can be ignored | |
*The above price is an example only, actual prices are shown in our Price List
Renewal of the domain with existing mailbox service
Existing mailboxes are also automatically renewed when the domain is renewed. If you do not wish this, mailboxes that are not to be renewed must be deleted before the domain renewal.
Mailbox deletion: grace period and statuses
When your domain name expires or you place a deletion order, your mailbox will go through a grace period, followed by a cool-down phase, and then permanent deletion. Below is an explanation of the different mailbox statuses based on each phase of its lifecycle:
| when | status | what happens |
|---|---|---|
| mailbox creation | active |
user is active, login is allowed |
| mailbox deletion 1: triggered by user action or expiration |
pending_deletion |
start of the grace period (14 days): the user may still log in, no email sending is possible |
| mailbox deletion 2 | deleted |
no login is possible, cool-down phase (14 days) |
| mailbox removal 1 | ready_for_removal |
user and data can be removed |
| mailbox removal 2 | removed |
user and data have been removed |
| mailbox suspension | suspended | login is allowed, email sending and receiving are not possible |
Creating a Mailbox
Creating a New Mailbox for Your Domain
Note: When ordering a mailbox for domains that are not using Joker.com nameservice, you need to make sure that you add the necessary DNS record to your nameservers. Those records are shown below, and also when you create your mailbox.
Add a mailbox to your domain in a few easy steps:
1. Click on the mailbox icon next to the domain name or choose "Mailbox" in the top menu:


2. On the next screen, click "Create":

3. Choose the subscription plan, create a name for your mailbox and click "Add":

4. Check it, click "Checkout":

5. Check your order carefully, accept T&C and click "Order":

6. You are done! In a few moments, a successfully created mailbox will appear on your dashboard:

Please note: the lifetime of the mailbox is bound to the domain term. If the domain term is less than one year, you will not receive a full mailbox year. To receive the full mailbox term, we recommend renewing the domain before ordering the mailbox!
Nameserver Records
We automatically add the entries required for your mailbox to the name server (in case the domain uses Joker.com nameservice). This also applies to SPF and DKIM.
You will only be notified if you have already made your own entries at this point – see also below.
Migrating an Existing Mailbox to Joker.com
If your domain already has existing MX records or email forwards ('email addresses'), you will see a warning message when creating a mailbox. We have designed the system in such a way that no changes are forced or made automatically, but you are shown the necessary changes. In this way, we want to ensure that no other existing e-mail services are unintentionally disrupted.
However, the mailbox will still be created. if you continue your order. To ensure your email works correctly, you’ll need to update the MX record manually later, resp. you need to remove the existing email forwards. Both can be done using the DNS-Editor in the Dashboard.
The records shown below are also needed in case you created mailboxes for domains which do use your own external nameservice.
The MX record you need to add is:
MX 10 smtp.joker.email
Also, a SPF record should be added if not yet existing, or extended if you already have one:
SPF does exist: Please add "include:_spf.joker.email"
SPF does not yet exist: Please add TXT record with "v=spf1 include:_spf.joker.email -all"
We also recommend using DKIM. To do this, simply add these two CNAME records:
jokermail1._domainkey.Your-Domain CNAME jokermail1._domainkey.joker.email
jokermail2._domainkey.Your-Domain CNAME jokermail2._domainkey.joker.email
Note: To conveniently transfer all emails from the old mailbox to your new one, you can simply drag and drop the folders from the old mailbox to the new one using the mail program ‘Thunderbird’, for example - where you have set up mailboxes.
Mailbox Management
To access the Mailbox configuration, enter the Domain Management by clicking on the "Mailbox" button:
Set the filter to "all domains with mailboxes", then click the mailbox icon next to the domain name:

Or you can manage your mailbox by clicking the mailbox icon next to the domain name on your dashboard:
Overview of Management Functions
Change Mailbox Name
1. Click the "edit" icon next to the mailbox name:

2. Enter the new desired name for your mailbox and click "save":

Set or Change Mailbox Password
After you have created a mailbox, you will need to set a password for it to be able to access your mailbox via the webmail client. In the same way, you can later change this password via Joker.com Mailbox configuration or directly via webmail client.
1. In the management menu, click "edit" icon:

2. Enter a desired password that is at least 8 characters long and contains a special symbol. Click "save":

Create and Manage Mailbox Aliases
For each of your mailboxes, you can create multiple aliases. The number of aliases you can create depends on your subscription plan. To create an alias:
1. Go to the mailbox management menu and click the "edit" icon under "Aliases":

2. Add a name for the alias and click "save" icon:

3. Manage aliases: after creating an alias, it will appear in the alias configuration. To delete an alias, click the trash bin icon next to it. You can also add more aliases as needed.

Multiple Mailboxes VS Aliases
A mailbox is a unique email account with its own inbox, login credentials, and settings. You can create multiple mailboxes for each of your domains:

The use cases for multiple mailboxes may be the following:
- Employee Mailboxes: Alice has alice@company.com and Bob has bob@company.com. Each has a separate inbox and password.
- Department Mailboxes: The sales team uses sales@company.com, and the support team uses support@company.com. Emails sent to these addresses go to separate mailboxes.
An alias is an alternative email address that directs emails to the same inbox as the primary mailbox.
Examples:
- Personal Aliases: Alice's primary mailbox is alice@company.com. She also has aliases such as a.smith@company.com and alicesmith@company.com. Emails sent to any of these addresses go to alice@company.com.
- Role-Based Aliases: Bob's primary mailbox is bob@company.com. He manages both marketing and events, so he has aliases marketing@company.com and events@company.com. Emails sent to these aliases also go to bob@company.com.
Summary
- Multiple Mailboxes: Separate email accounts with individual logins and inboxes. Ideal for different users or departments.
- Multiple Aliases: Different email addresses that direct to a single inbox. Ideal for handling variations of a name or multiple roles by one person.
Using Dynamic Email Aliases
Dynamic email aliases allow you to create customised variations of your main mailbox address without additional configuration. By appending a +tag to your base email (e.g., info+newsletter@mydomain.com). Messages will still be delivered to info@mydomain.com.
This feature is useful for:
- Organising incoming messages by purpose or sender
- Tracking email signups or campaign sources
- Filtering or setting up rules in your email client
To start using a dynamic alias, simply use the format info+yourtag@mydomain.com when submitting your email address. No setup is required—emails sent to this alias will automatically be delivered to your main info@mydomain.com inbox.
Using Catch-all Alias
By using the special alias ‘*’, your mailbox will accept all emails sent to this mailbox. You can then use the SIEVE filter options in the webmail client, for example, to process the incoming emails.
Change mailbox tariff
Unfortunately, it is not yet possible to switch from one mailbox tariff to another via the user interface. If you would like to switch from the ‘Basic’ mailbox to ‘Plus’, e.g. to increase the storage space, please contact our support team, who will then make the necessary arrangements for you.
Deleting mailboxes
To delete your mailbox, go to the mailbox management menu and click on "delete" icon:

To avoid accidental deletion, you will be asked to enter the full mailbox address you intend to delete:

After you delete your mailbox, it will go through a grace period and a cool-down phase, which are explained here.
Webmail Client: Usage and Plugin Overview
Main Functions
Our Joker.com webmail client is based on Roundcube Webmail, below you will find the original documentation and how-tos:
Important: to access your newly created mailbox, you have to set a password for it using the mailbox configurator at Joker.com. The instructions can be found here.
Plugin Overview
|
Responses |
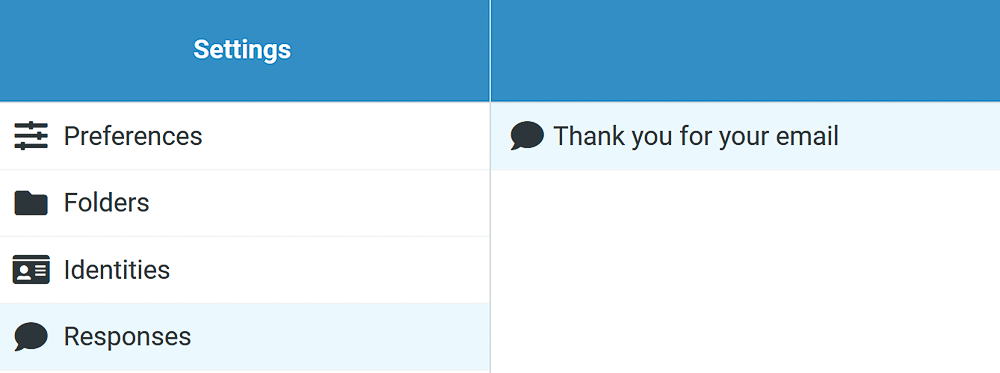 |
Allows to save pre-written frequently used responses. |
|
Mailbox Quota |
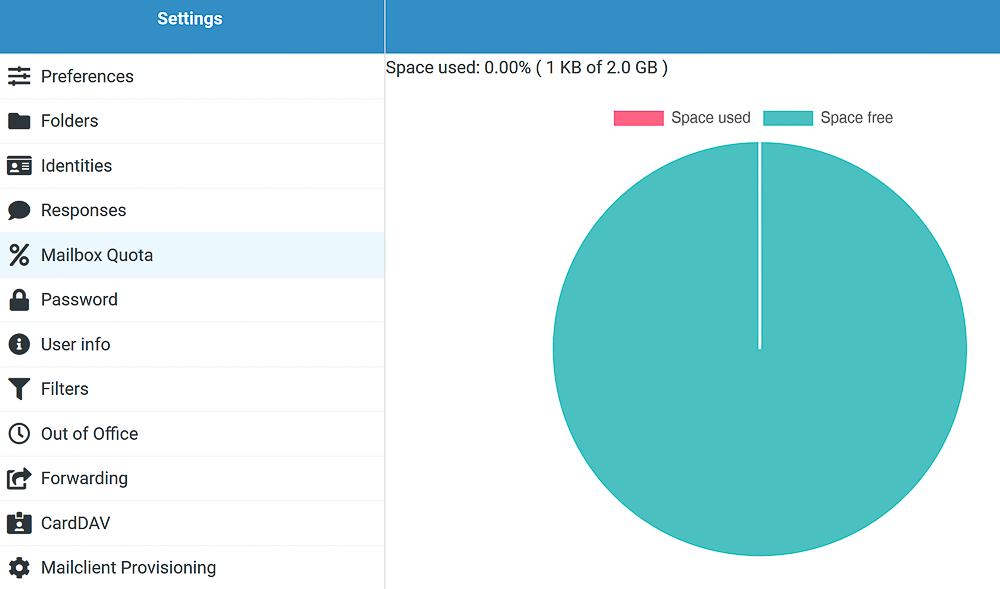 |
A quick overview of free and used space according to your subscription plan. |
|
Password |
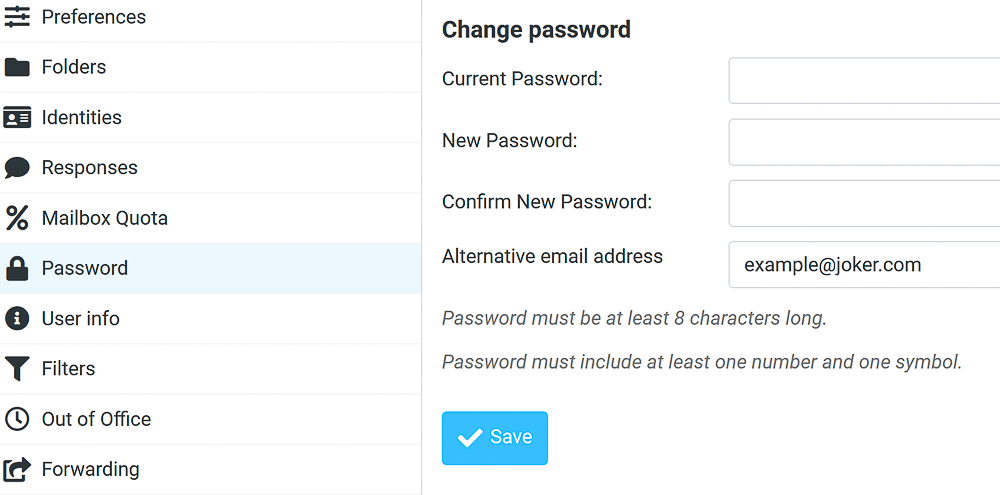 |
Allows you to change the password for your mailbox and add an alternative email address. An alternative email address is essential for recovering access to your mailbox. To ensure you can always regain access quickly and securely, we highly recommend providing one if possible. |
|
User info |
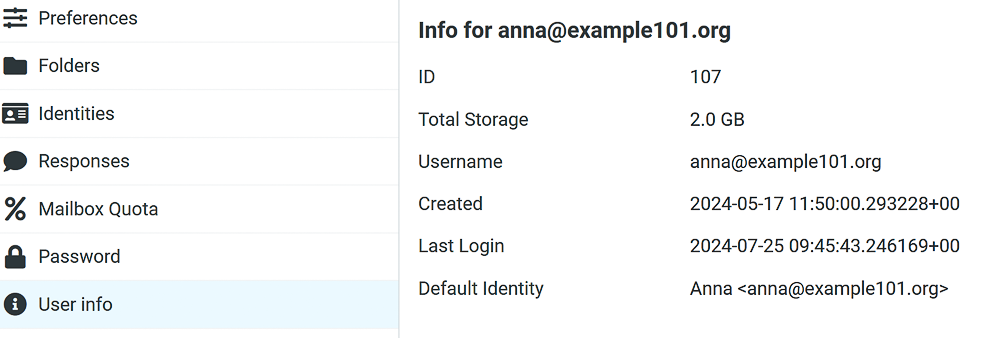 |
Overview of user information including the allocated space for your mail according to your subscription plan. |
|
Filters |
 |
Allows creating filters, managing rules and sorting incoming emails. |
|
Forwarding |
 |
Allows to send a copy or redirect the incoming emails to desired address. Can be enabled and disabled anytime. |
|
CardDAV |
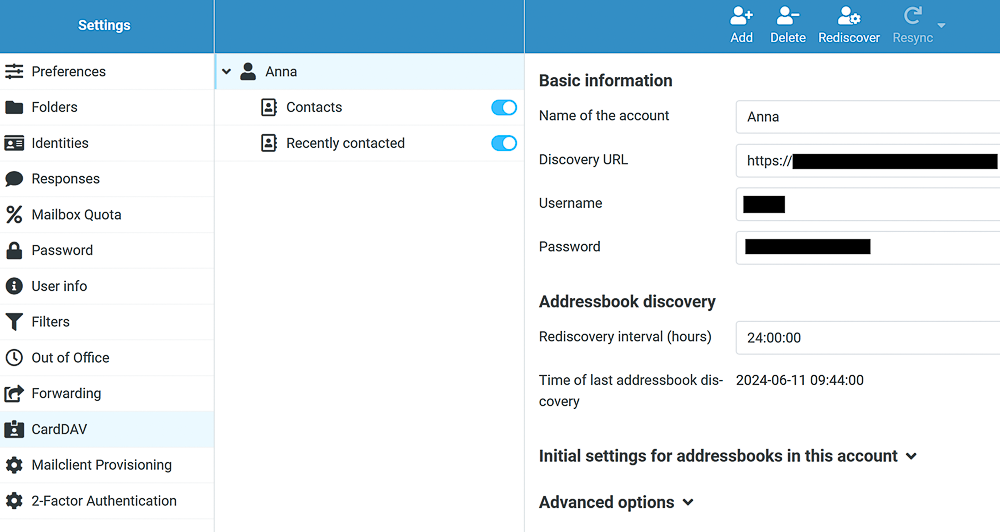 |
This plugin allows you to keep your contact list up-to-date and synchronized across your mailboxes. Please find more information on GitHub. |
|
Mailclient Provisioning |
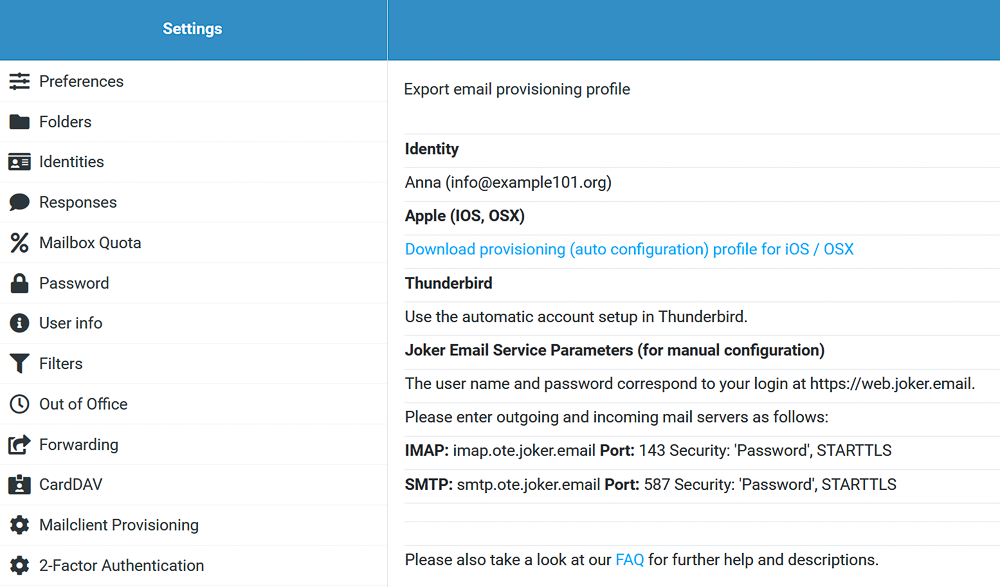 |
Provides automatic configuration files and manual settings for using your Joker mail across different webmail clients like Thunderbird etc:
Username and password: same as your login at https://web.joker.email.
IMAP: imap.joker.email Port: 143 Security: 'Password', STARTTLS
SMTP: smtp.joker.email Port: 587 Security: 'Password', STARTTLS
|
|
Two FA |
 |
This feature adds an extra layer of protection by requiring a six-digit security code, in addition to your password, whenever you log in to your mailbox.
Here are the recommended apps:
|
|
Layout preferences |
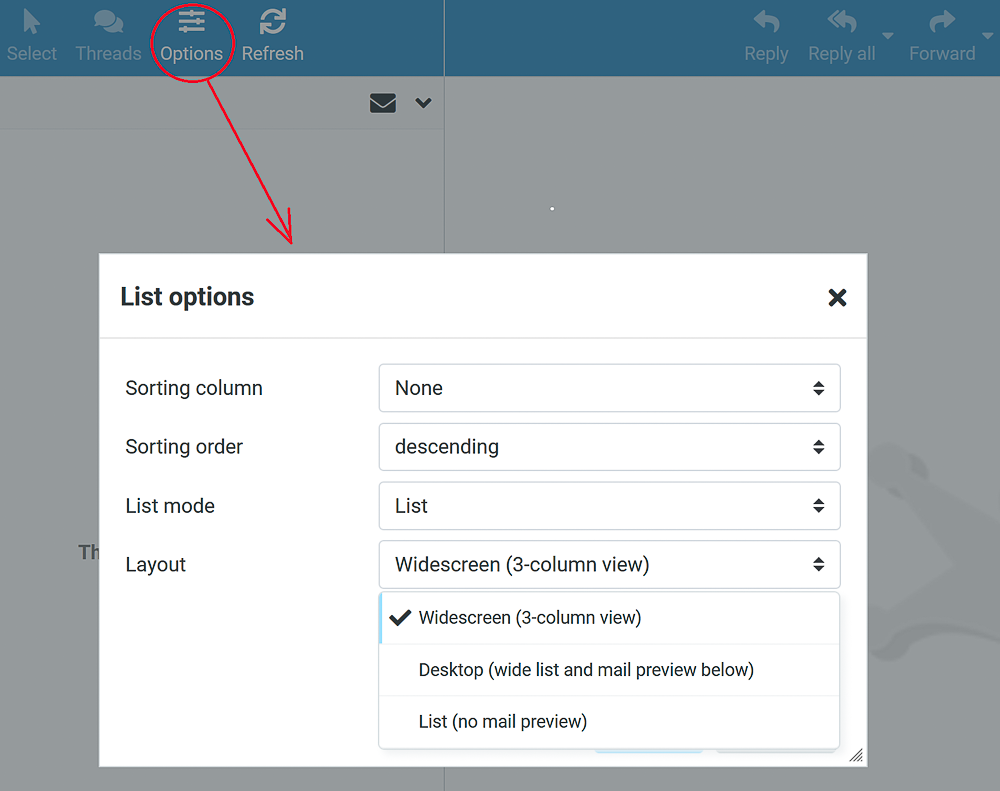 |
Allows you to choose the desired appearance of your mailbox. |
Configuring Joker.com Mailboxes with Mail Clients
To use your Joker.com mailbox with popular email clients, you have two options: automatic provisioning – use the provided files for easy configuration, and manual setup – enter the required settings yourself.
Joker email service parameters:
| Username and password | same as your login at https://web.joker.email |
| IMAP | imap.joker.email |
| Port | 143 (TLS: 993) |
| Security: | 'Password', STARTTLS (or TLS for port 993) |
| SMTP | smtp.joker.email |
| Port | 587 |
| Security: | 'Password', STARTTLS |
| POP3 | pop3.joker.email |
| Port | 110 (TLS: 995) |
| Security: | 'Password' (or TLS for port 993) |
Below, you’ll find examples of how to set up your mailbox with popular email clients.
| Thunderbird | Use the automatic account setup in Thunderbird, or set up the provisioning manually as described above. |
| IOS |
Download provisioning profile under "Mailclient Provisioning" section as shown on the screenshot below:
Or set up the provisioning manually as described above. Below, you will find step-by-step instructions on how to set up your Joker.com mailbox on IOS device. |
| Android | Set up the provisioning manually using the parameters specified above, in case the automatic configuration does not succeed. |
| Windows | Set up the provisioning manually using the parameters specified above. |

Setting up your Joker.com Mailbox on IOS device (iPhone, iPad, etc.)
1. Login to https://web.joker.email using your IOS device (iPhone, iPad, Mac)
2. Visit 'Settings' -> 'Mailclient provisioning', and click on the 'provisioning profile' link. You will get the prompt "Profile loaded".
3. Go to the iPhone/iPad settings, under your account name, you will see the downloaded profile; click on it:

4. Click "Install":
The "Not signed" warings can be safely ignored.

5. Enter your password and click "next". It may take a minute for the profile to install.

After this, you will find the new mailbox account listed in your "'Mail' app.
Mailboxes: Troubleshooting
I've lost my password and can't log in anymore
If you've lost your password and can't log in, don't worry — there are two ways to recover access:
-
Use Your Alternative Email Address
When you create a mailbox, it's important to add an alternative email address. This address will be used for password recovery. To reset your password:
-
Click on "I Forgot Password" on the login page.
-
Recovery instructions will be sent to your alternative email address.
(If you haven't set an alternative email, we recommend doing so as soon as you regain access.)
-
Set a New Password via Joker.com
You can also set a new password directly through Joker.com. Detailed instructions are available here.
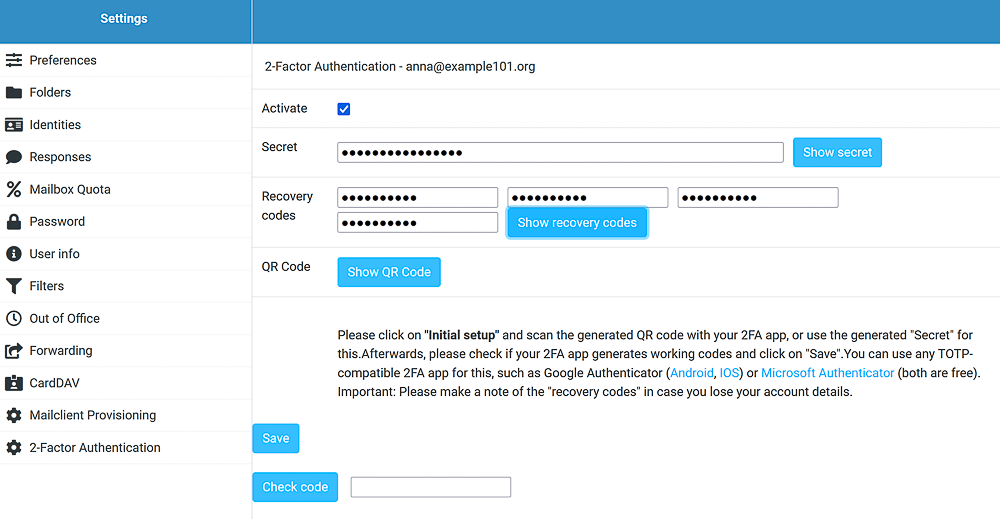
Two-Factor Authentication (2FA): Setup and Recovery
Setting Up 2FA
-
Click on "Initial Setup" to begin.
-
A secret and recovery codes will be generated automatically.
-
In your authenticator app, scan the QR code or manually enter the secret to generate one-time codes.
-
Check the box labeled "Activate" to enable 2FA.
That's it! The next time you log in, 2FA will be active.
Important: Be sure to save and securely store your recovery codes. You may need them if you ever encounter issues with your authenticator app.
Recovering Access
If you, for some reason,n cannot log in using a one-time password (OTP) from your authenticator app, you can use one of your recovery codes. After the initial setup, you receive four recovery codes, and each code can only be used once.
Once you've logged in with a recovery code, you can set up 2FA again by scanning a new QR code with your authenticator app.
You can also manually create a new set of recovery codes at any time.
Email Security
SPF (Sender Policy Framework)
SPF is an email authentication method that specifies which mail servers are allowed to send emails on behalf of your domain. This helps receiving servers detect and block unauthorized senders, reducing the risk of spam and phishing using your domain.
-
Joker.com mailboxes: SPF records are automatically created, so no action is needed.
-
Other mail services: You need to create an SPF TXT record yourself as described here. Instructions for adding SPF records can be found here
If you create an Email Forwarding at Joker.com, an SPF record is not created automatically. It is strongly recommended to create and set up an SPF record for forwards - especially if you forward emails to providers such as Gmail - to ensure proper email delivery.
How it works:
-
When an email is sent, the receiving server checks your SPF record.
-
If the sending server is listed in your SPF record, the email passes authentication.
-
If it’s not listed, the email may be marked as spam or rejected.
DKIM (DomainKeys Identified Mail)
DKIM adds a digital signature to your outgoing emails, ensuring that the message hasn’t been tampered with and that it really comes from your domain. This improves trust with email providers and recipients.
-
Joker.com mailboxes: DKIM records are automatically set up.
-
Other mail services: You need to create a DKIM TXT record yourself. Instructions for adding DKIM records can be found here
How it works:
-
Your mail server signs each outgoing email with a private key.
-
The receiving server uses the public key in your DKIM record to verify the signature.
-
If the signature matches, the email passes authentication; if not, it may be flagged as suspicious.
DMARC (Domain-based Message Authentication, Reporting & Conformance)
What is DMARC?
DMARC (Domain-based Message Authentication, Reporting & Conformance) is an email authentication standard that helps protect your domain from email spoofing and phishing. It works with SPF and DKIM to tell receiving mail servers how to handle emails that fail authentication.
What does a DMARC record help you with?
A DMARC record helps you:
-
Prevent attackers from sending fake emails using your domain
-
Improve email deliverability
-
Gain visibility into who is sending email on behalf of your domain
-
Protect your brand and users from phishing
What should I do before setting up DMARC?
Before setting up DMARC, make sure that you have SPF and DKIM records in place for your domain.
If you are using Joker Mailboxes, SPF and DKIM are set up automatically.
How is a DMARC record added?
A DMARC record is added as a DNS TXT record for your domain. The basic format of a DMARC record starts with v=DMARC1; p=, followed by your policy.
-
In the DNS configuration section, choose "TXT" as record type.
-
The Name field should be set to
_dmarc. -
In the Content field, paste your DMARC policy (example below).
What does a simple DMARC record look like?
A simple DMARC record for monitoring only looks like:
Explanation:
-
v=DMARC1– DMARC version (required) -
p=none– Monitor only, no enforcement -
rua=– Email address where aggregate reports are sent
Starting with p=none allows you to monitor email traffic without blocking anything. Once you review reports and confirm legitimate senders are properly authenticated, you can gradually move to a stricter policy (quarantine then reject) as you gain confidence in your email sending practices and ensure that legitimate emails are properly authenticated.
What are the available DMARC policies?
-
p=none– Monitor only, no action taken on failed messages -
p=quarantine– Place failing messages in spam/junk folder -
p=reject– Block delivery of failing messages completely
Example of a strict policy:
What information do DMARC reports show?
DMARC reports show:
-
Which servers send email for your domain
-
Whether emails pass or fail SPF/DKIM
-
Potential abuse or misconfiguration
Reports are sent in XML format to the email address specified in rua.
How can I check if my DMARC record is working?
-
Use online DMARC lookup tools like DMARC Analyzer, MXToolbox, or Google Admin Toolbox
-
Run a DNS TXT lookup for
_dmarc.example.com -
Wait for DMARC reports to arrive at your reporting address
Features
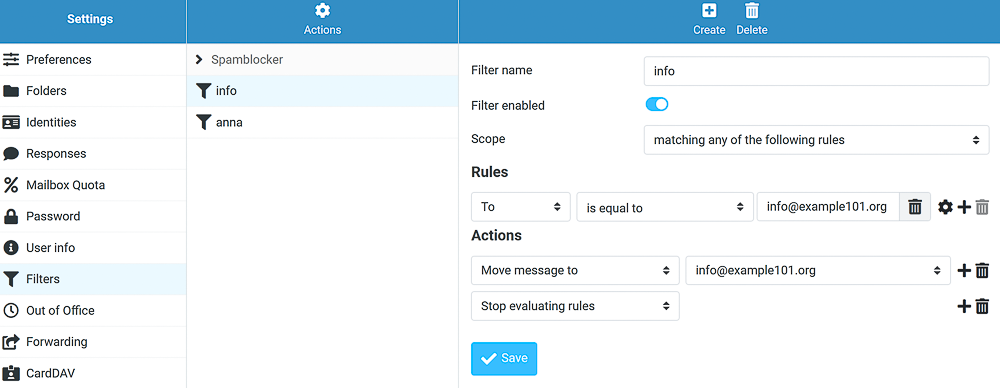
Message Filters
The Joker.com mail client includes a powerful Message Filters feature that lets you automate the handling of incoming emails. Filters can organise your mailbox, reduce clutter, and help you stay focused on the messages that matter most.
Incoming message filters are customizable rules that automatically apply actions to emails as soon as they arrive. You define the conditions - such as sender, subject, or message content - and select what should happen to messages that match these conditions.
Filters can be used to:
- Sort messages into dedicated folders
- Highlight important mail
- Reduce spam visibility
- Organise newsletters or automated notifications
- Apply multiple rules automatically without manual sorting
Each filter can be enabled or disabled at any time without removing its settings.
Where to Find the Feature:
- Log in to Joker.com mail client.
- Open the Settings panel.
- Navigate to the Filters or section.
In this view, you can create new rules, edit existing ones, reorder filters, or temporarily deactivate them.

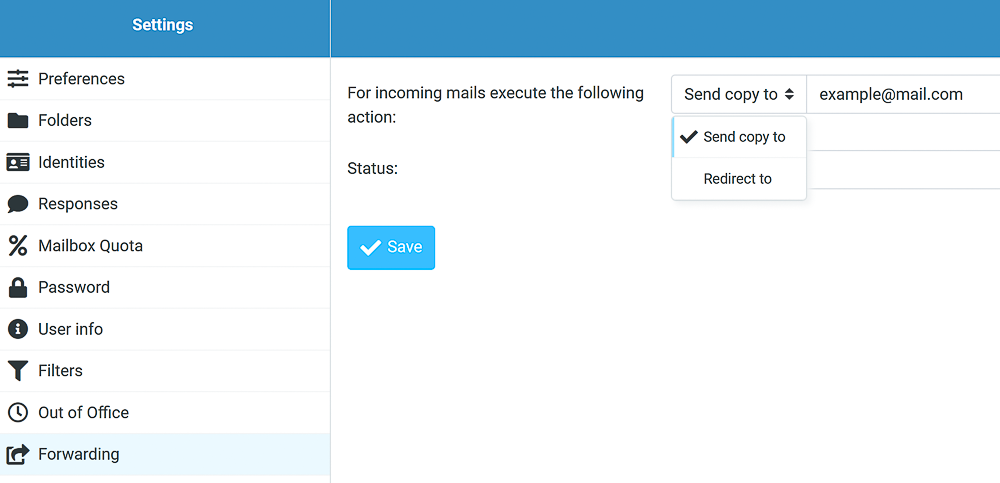
Email Redirection
The Joker.com mail client includes a flexible Email Redirection feature that allows you to automatically send incoming messages to another email address. This can be useful when you want to monitor your mailbox from a different account, keep backups of your mail, or route messages to colleagues or additional mailboxes.
Email redirection automatically handles every incoming message according to the rules you configure. The option can be turned on or off at any time, and supports two behaviours:
- Send a Copy to – Keeps the original message in your Joker.com mailbox and sends an additional copy to the target address.
- Redirect to – Redirects the email entirely to the target address, without storing it in your Joker.com mailbox.
Depending on your workflow, you can choose the mode that fits your needs.
Where to Find the Feature:
- Log in to Joker.com mail client.
- Open the Settings panel.
- Navigate to the Forwarding section.

If you want to forward emails without creating a Joker.com mailbox, you can use the email forwarding option available directly in the DNS Manager of your domain.